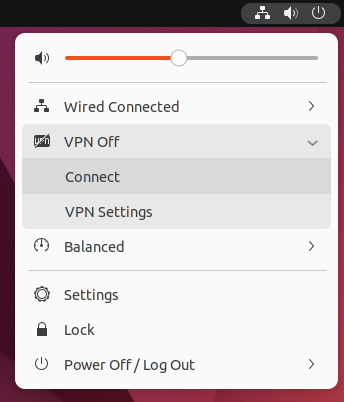
Ubuntu/Mint OpenVPN on Network Manager
Download the SlickVPN crt file SV-2022crt
(Please rename the file from SlickVPNcrt to SlickVPN.crt)
1. Open the terminal
2. Install OpenVPN network manager by entering (copy/paste) into the terminal:
sudo apt-get install network-manager-openvpn
and hit Return or Enter
sudo apt-get install network-manager-openvpn-gnome
and hit Return or Enter
3. Restart the Network Manager
systemctl restart NetworkManager
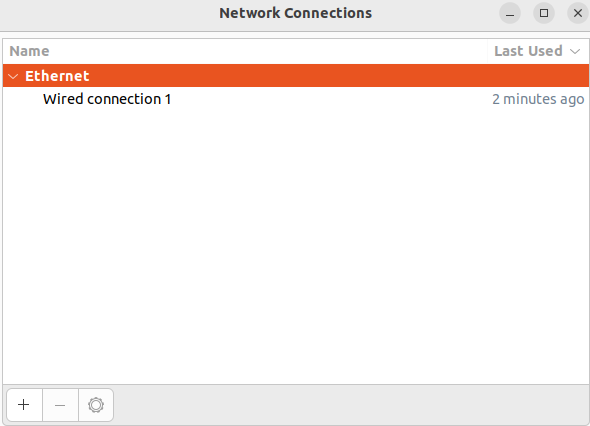
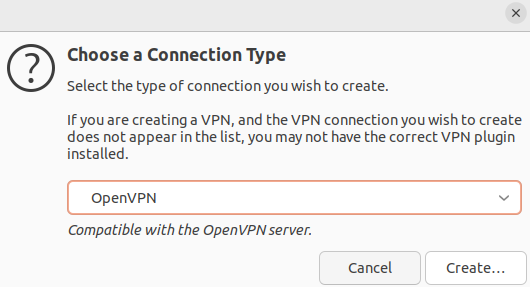
4. Go to Network Manager, click Network Connections. Click the ‘+’ button in the Network Connections window and choose OpenVPN from the dropdown menu
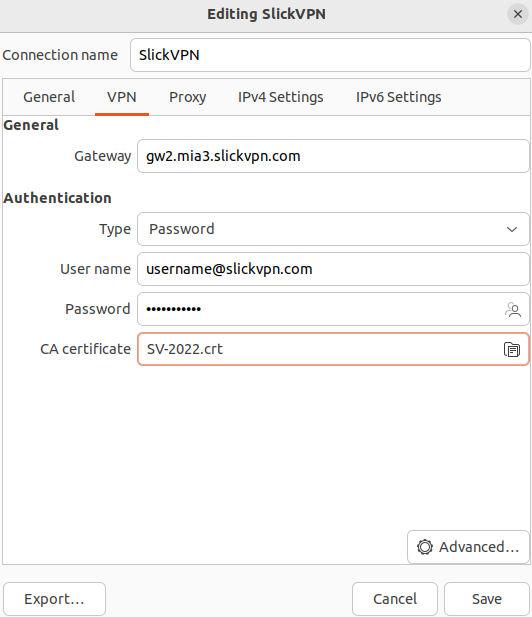
5. In the Editing VPN connection window, Enter the following details:
- Connection name: SlickVPN
- Gateway: gw2.iad1.slickvpn.com or choose a gateway from here
- Type: Password
- Username: SlickVPN Username
- Password: SlickVPN Main Password
- CA Certificate: slickvpn.crt
6. Click Advanced near the bottom of the window.
In the General tab
- Custom gateway port: 443 or 8888
- [Optional]: Use TCP connection
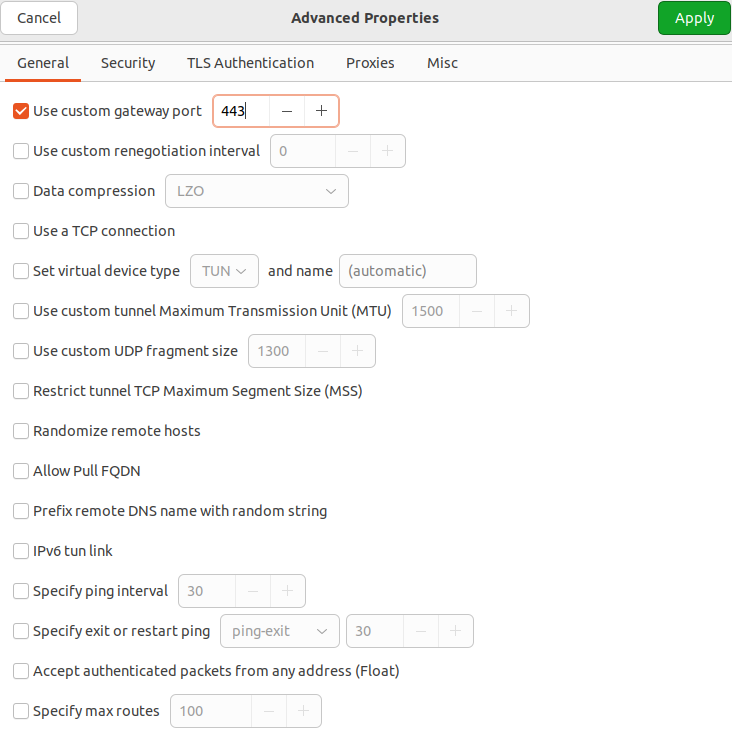
The Security tab
Cipher: AES-256-CBC
HMAC Authentication: SHA-1

Click Apply;
Click Save
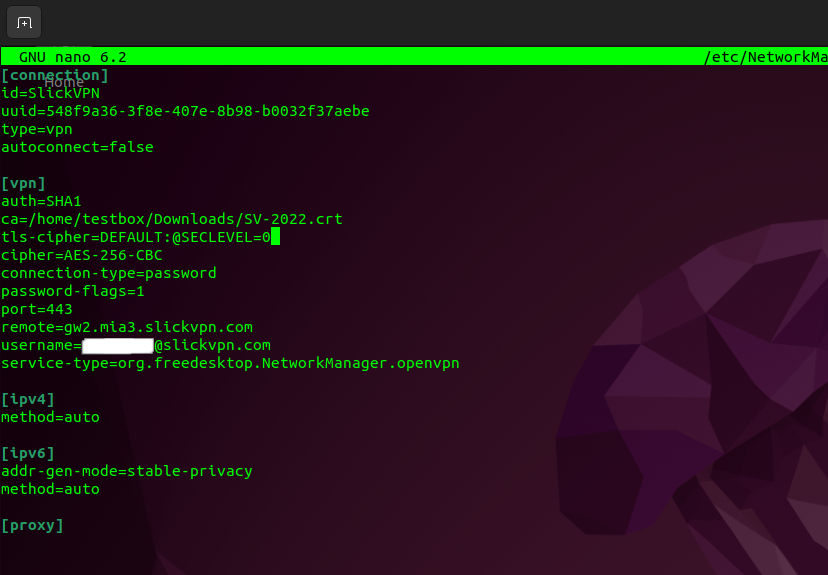
7. Go back to Terminal and enter the following
sudo nano /etc/NetworkManager/system-connections/SlickVPN.nmconnection

add this line under ca
tls-cipher=DEFAULT:@SECLEVEL=0
8. Restart Network Manager
systemctl restart NetworkManager
9. Start the connection to the VPN from Network Manager