Synology Guide DSM 5.0/6.0
Setup: Download the SlickVPN CA and .ovpn file
Certificate Authority: SlickVPN CA
City: Washington DC, London, Los Angeles
OpenVPN config files (.ovpn) are an easy way to configure OpenVPN on your Synology. You can change the location by opening the .ovpn file in any editor and changing the third line in the file. It will look like this:
remote gw3.iad1.slickvpn.com 8888
Change the server address ( gw1.iad1 bit) to any location listed here
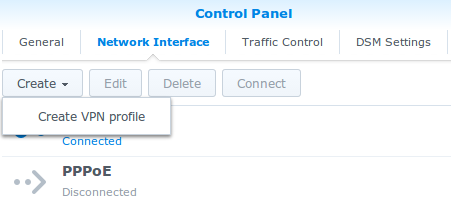
1. Open Control Panel; Go to Network; Go to Network Interface tab; Create VPN Profile
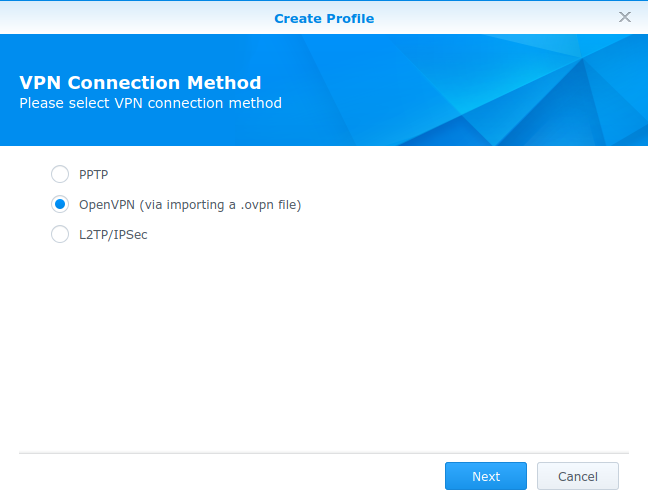
2. Select OpenVPN as the VPN Connection Method
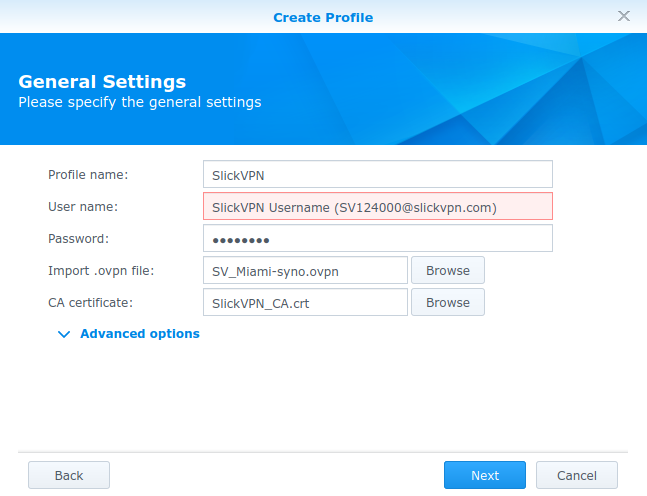
3.Fill in the General Settings as indicated
Profile name – SlickVPN
User name – Your SlickVPN username
Password – Main account password
.ovpn file – Browse to the ovpn file downloaded in Setup
Certificate – Browse to the CA file downloaded in Setup
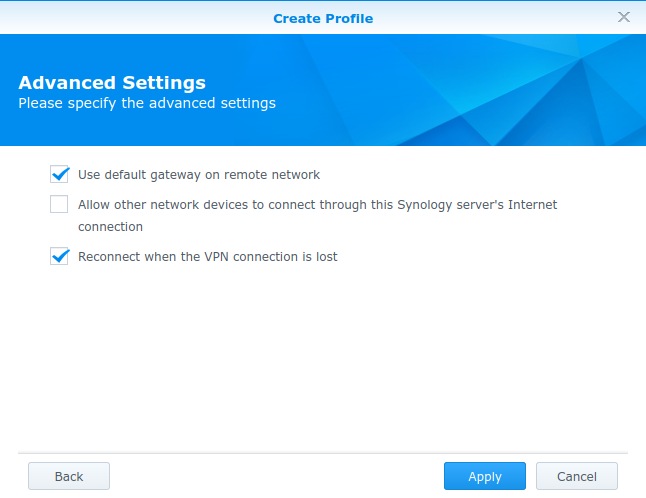
4. Advanced Settings
Check Use default gateway on remote network
Check Reconnect when the VPN connection is lost.
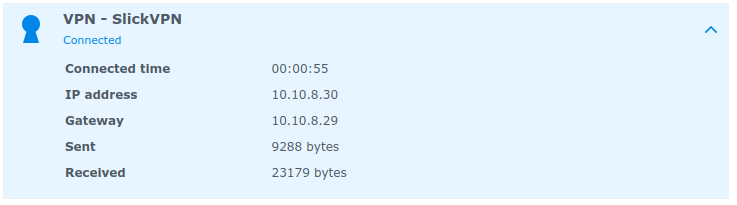
5. Select the new connection; Click Connect
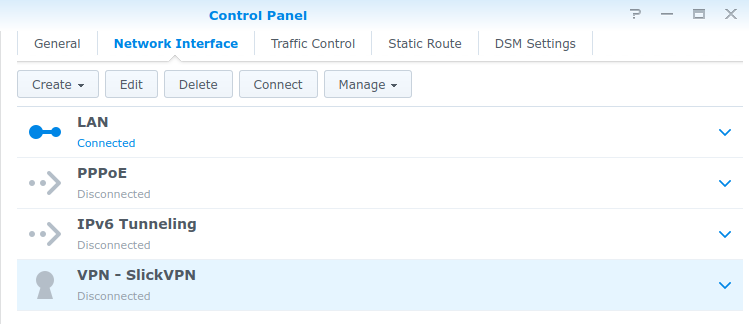
6. Wait until you see the connection is established